When I built my NAS, I envisioned a centralized system for managing everything from storage to hosting services. However, what followed was a lesson in troubleshooting and learning, especially when it came to dealing with port conflicts. One of the trickiest issues I encountered was related to TrueNAS’s default Nginx ports (30021 and 30022). I had to reconfigure these ports to 80 and 443 to achieve the seamless integration I wanted. Here’s how I identified and resolved the problem.
The Source of the Problem
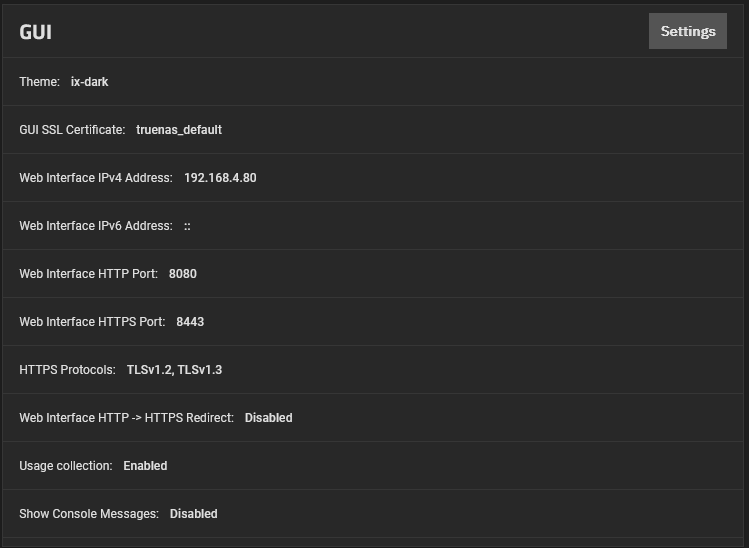
Initially, I changed my NAS management ports to 8080 and 8443, thinking this would help avoid conflicts with other services. However, I didn’t realize that some of the TrueNAS apps I had integrated were using non-standard ports like 30021 and 30022 by default. These unusual ports created problems with my router's port forwarding, and when I tried to access my site, I kept getting host errors.
Identifying the Issue
At first, I couldn’t figure out why some of my services weren’t working. The issue wasn’t with TrueNAS itself, but with the apps I had added. The developers of these apps had chosen unusual ports, which caused issues when I tried setting up port forwarding on my router. Services expecting the standard HTTP/HTTPS ports (80 and 443) weren’t working properly because they were using ports like 30021 and 30022.
The Fix: Changing TrueNAS Nginx Ports
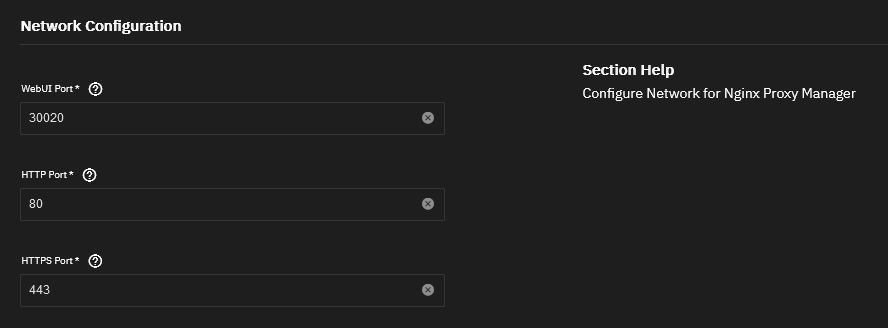
Once I identified the problem, I reconfigured TrueNAS’s Nginx service to use standard ports (80 for HTTP and 443 for HTTPS). Here’s how I did it:
- Accessing TrueNAS Configuration: I logged into TrueNAS and navigated to the settings for the integrated Nginx service.
- Changing the Ports: I updated the Nginx configuration to use ports 80 and 443 instead of the defaults (30021 and 30022).
- Updating Router Rules: To ensure proper traffic routing, I updated my router’s port-forwarding settings to reflect these changes.
Migrating Services to My NAS
Once the ports were properly configured, I moved my existing services, which had previously been hosted on a separate device, onto my NAS:
- Reverse Proxy with Nginx: I configured Nginx to serve as a reverse proxy, allowing me to route traffic to various apps and VMs hosted on the NAS.
- DDNS Integration: I set up DDNS on the NAS to keep my public IP synced with my domain, making all hosted services accessible via a custom domain.
Migrating DDNS, Here is where Dockage Comes In Play
When I first migrated my NAS services I ran into an issue where I myself could not get the hang of any integraded DDNS applications that Developers have made on Dokcer, Applications like CloudFlared and DDNS Changer
This is where I settled for an application called Dockage which provides me a similar experience as using Docker Desktop, this let me copy my previous Yaml Configuration, this brought ease to my transistioning of serivces as I only had to make very minimal changes to my config

Issue: Unable to Edit Files in Docker Container
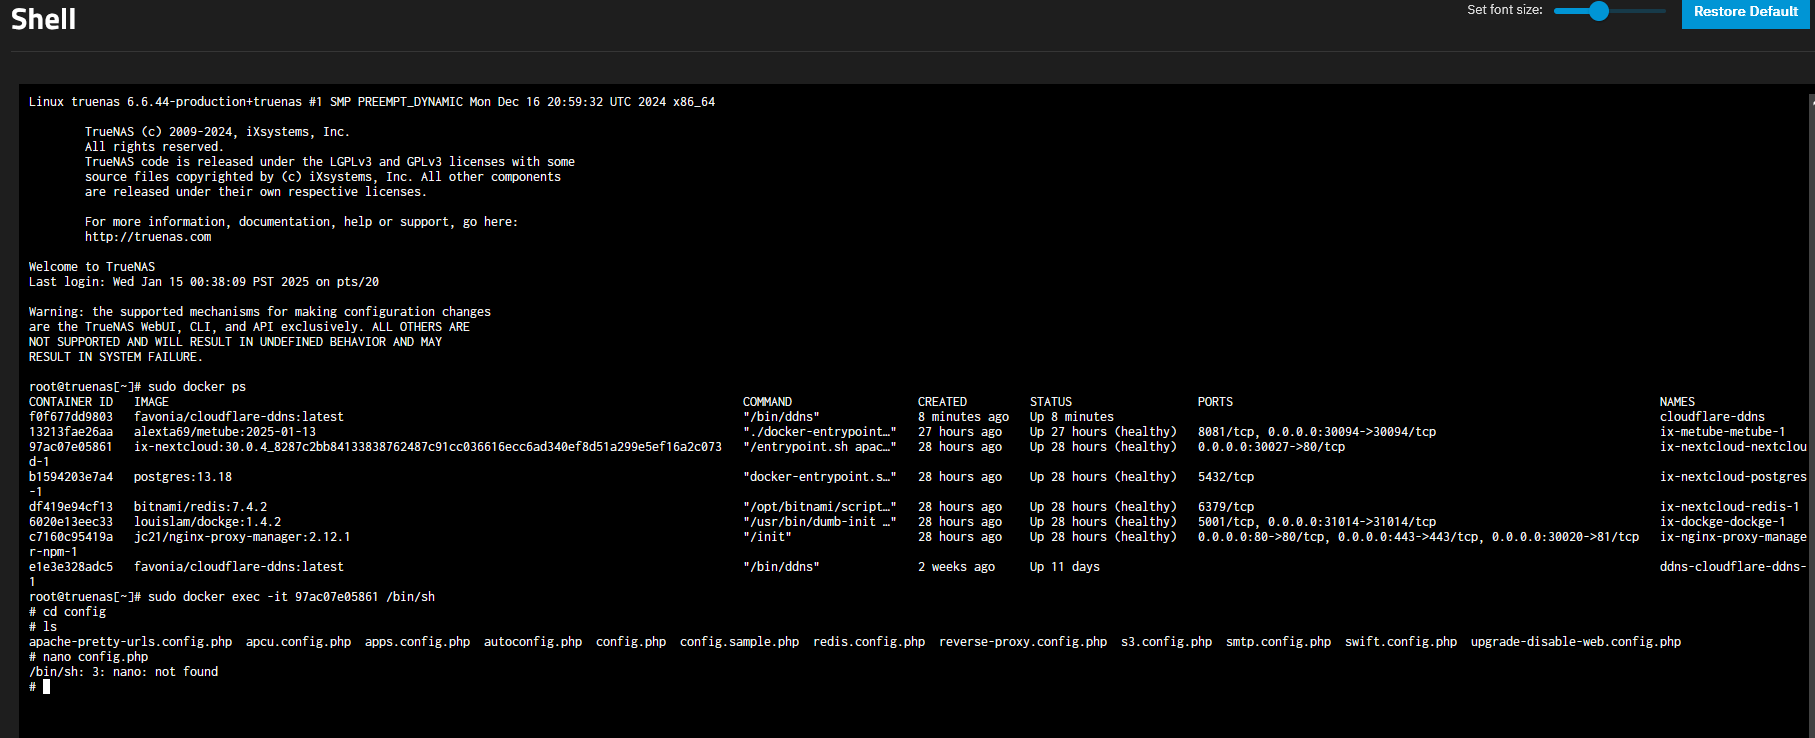
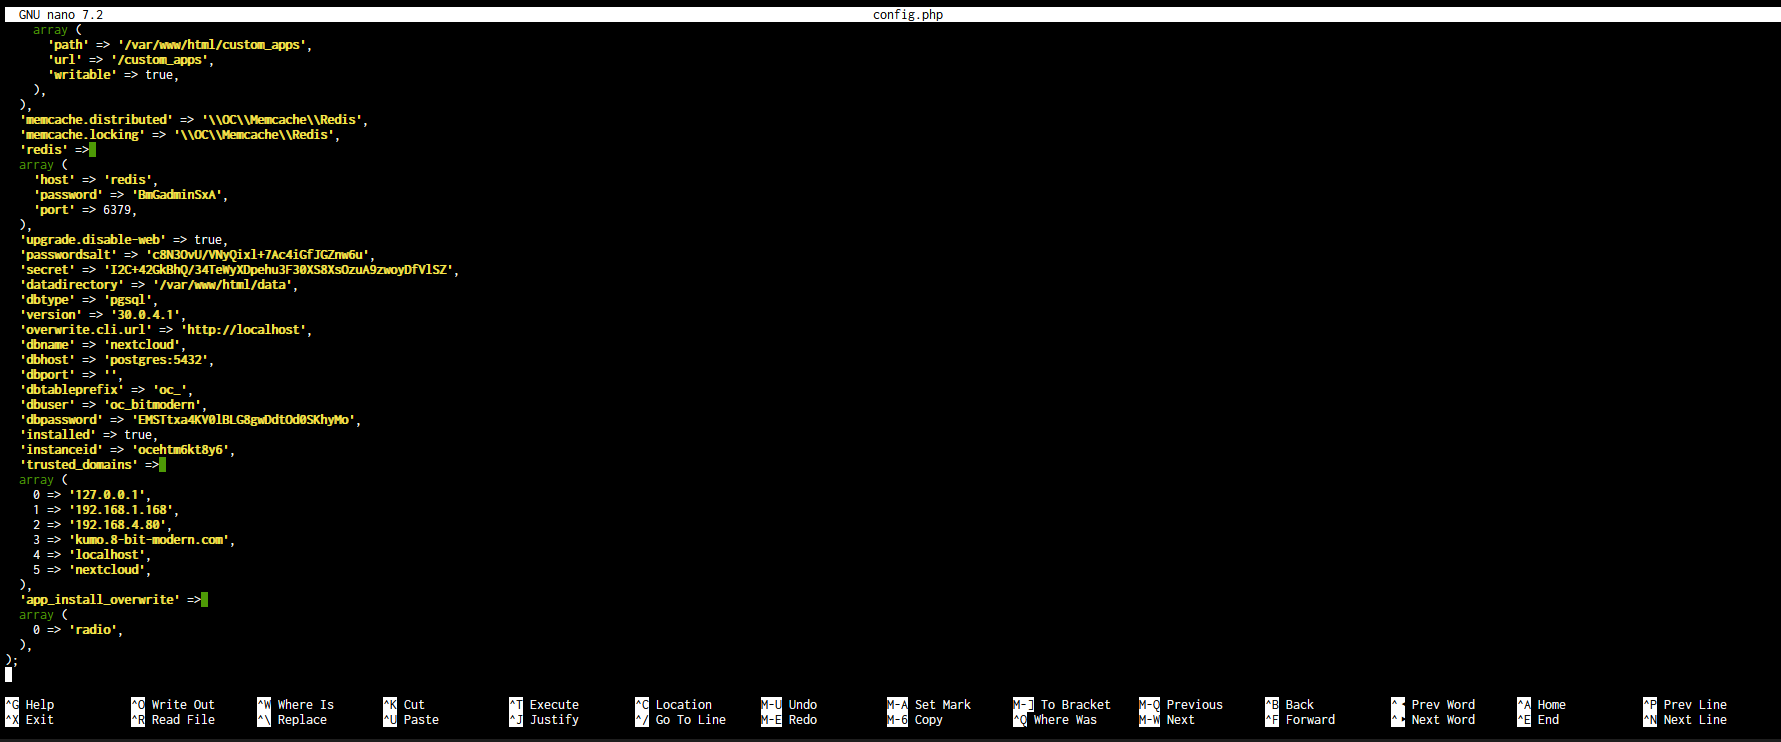
I encountered a frustrating issue while trying to access and edit files within a Docker container. My goal was to modify a configuration file (config.php), but I ran into some barriersn or issues when trying to open and edit the file directly using typical methods.
At first, I thought I could simply `sh` into the container using sudo docker exec -it <container_id> /bin/sh and edit the file with a text editor like nano or vi, but I quickly realized that I didn’t have the ability do this inside the container. The problem seemed to be related to user permissions and Docker’s security constraints, which prevent certain operations from being taken, it might also be related to how I have bridging setup on the network because I think I should be able to apt install nano. It seems you do not have those packages availble when inside the container shell. This is common in Docker containers as they often have stricter security settings compared to your host system.
My First Attempt
I tried using sudo docker exec -it <container_id> /bin/sh to get a shell inside the container and then attempted to use a text editor. As stated in the previous paragraph you see I was not able to use a text editor.
The Workaround That Worked
Rather than trying to edit the file directly with a text editor within the container, I decided to try searching for the file using the find command:
find /mnt -name "config.php"
This allowed me to locate the exact path of the file. Once I found the path, I navigated to the directory using cd:
cd /path/to/directory
Then, I was able to open the file with nano, and this gave me the ability to edit it.
Conclusion
In the end, the find command gave me the precise file path, and then I was able to use nano to edit the file. Although this method worked, I still don’t fully understand why using a text editor initially didn’t work. I suspect it has something to do with user permissions or container settings, which restrict access to certain files for security.
What’s Next?
With my NAS now running smoothly, I’m excited to explore more possibilities, like experimenting with additional self-hosted apps.